Background/Motivation
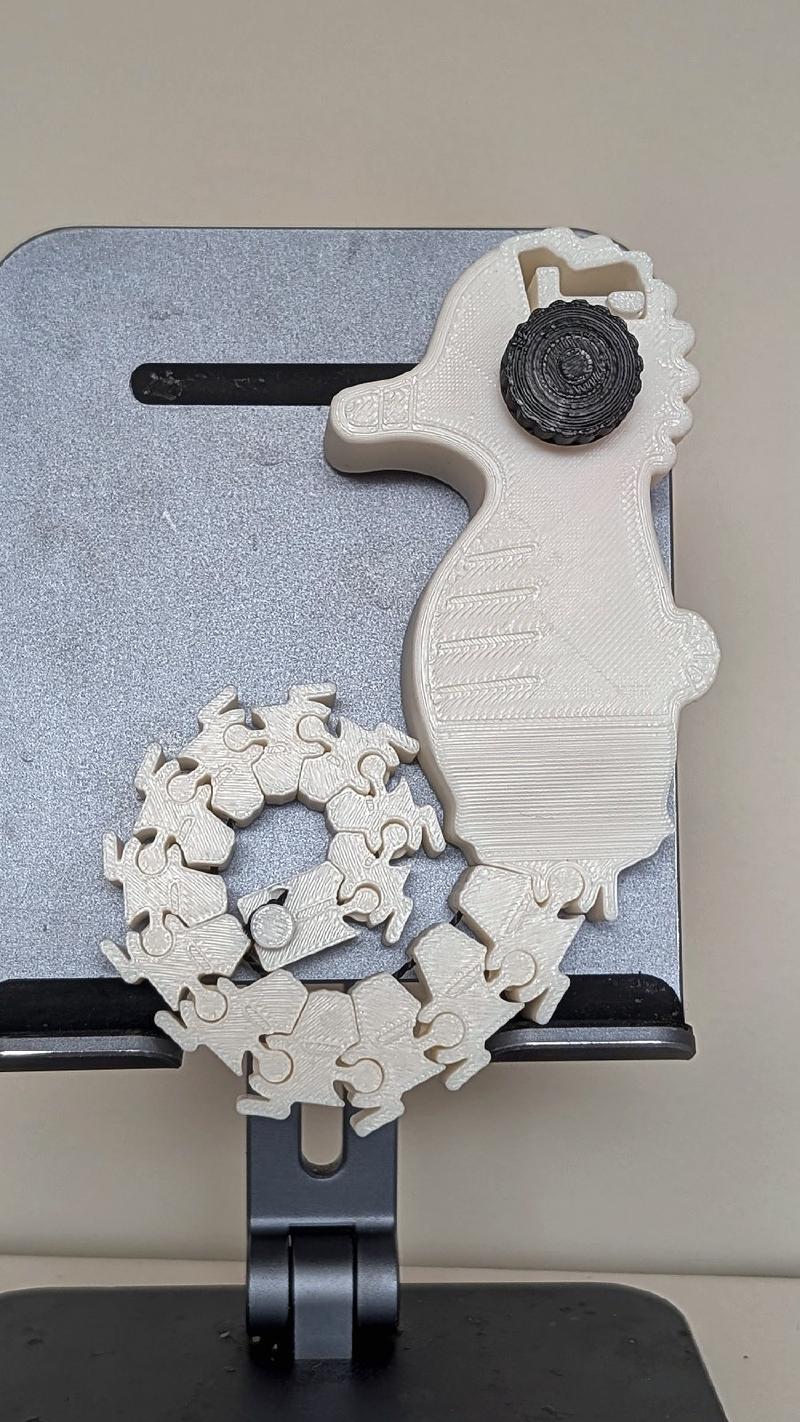
When I saw the MakerWorld Biomimicry Design Contest, the seahorse tail came to mind right away. A seahorse tail isn’t round, it’s square, made of small bony plates. Researchers found (Porter et al., Science, 2015) that the square shape grips better and doesn’t twist as easily as a round one. I wanted a model where you can actually see that tail curl.
At first the idea was a clamp, a seahorse that grabs things with its tail. Along the way it turned into a model that shows how the tail curls, and honestly that is the better version of it.
Model Design/Modeling
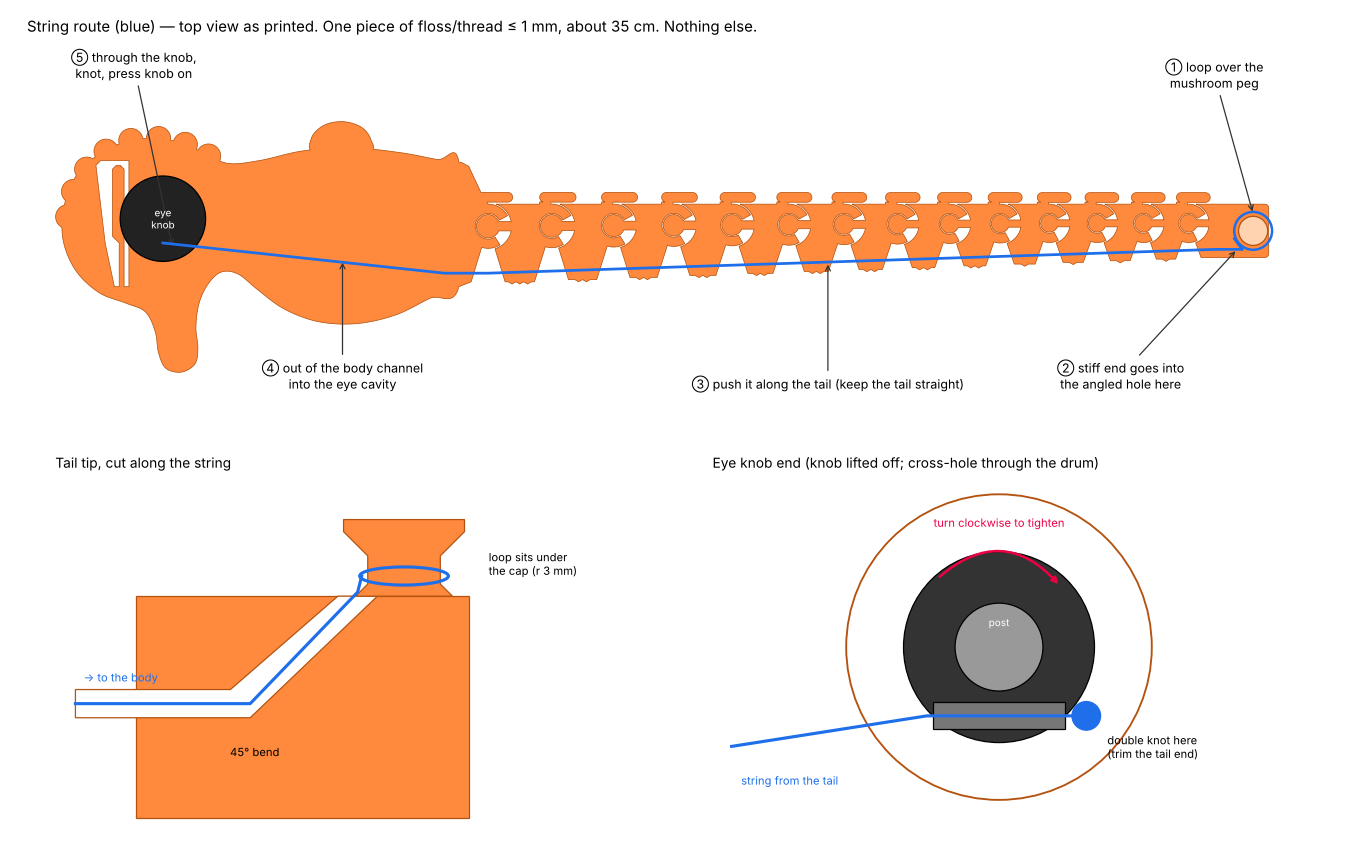
The tail is 14 square plates, print-in-place, getting smaller toward the tip like the real one. The joints only bend toward the belly, so the tail only curls one way. One cord runs along the belly like the muscle, and the black eye is the winding knob: turn it and the tail rolls up. The fin above the eye works as the release.
The joints were the easy part
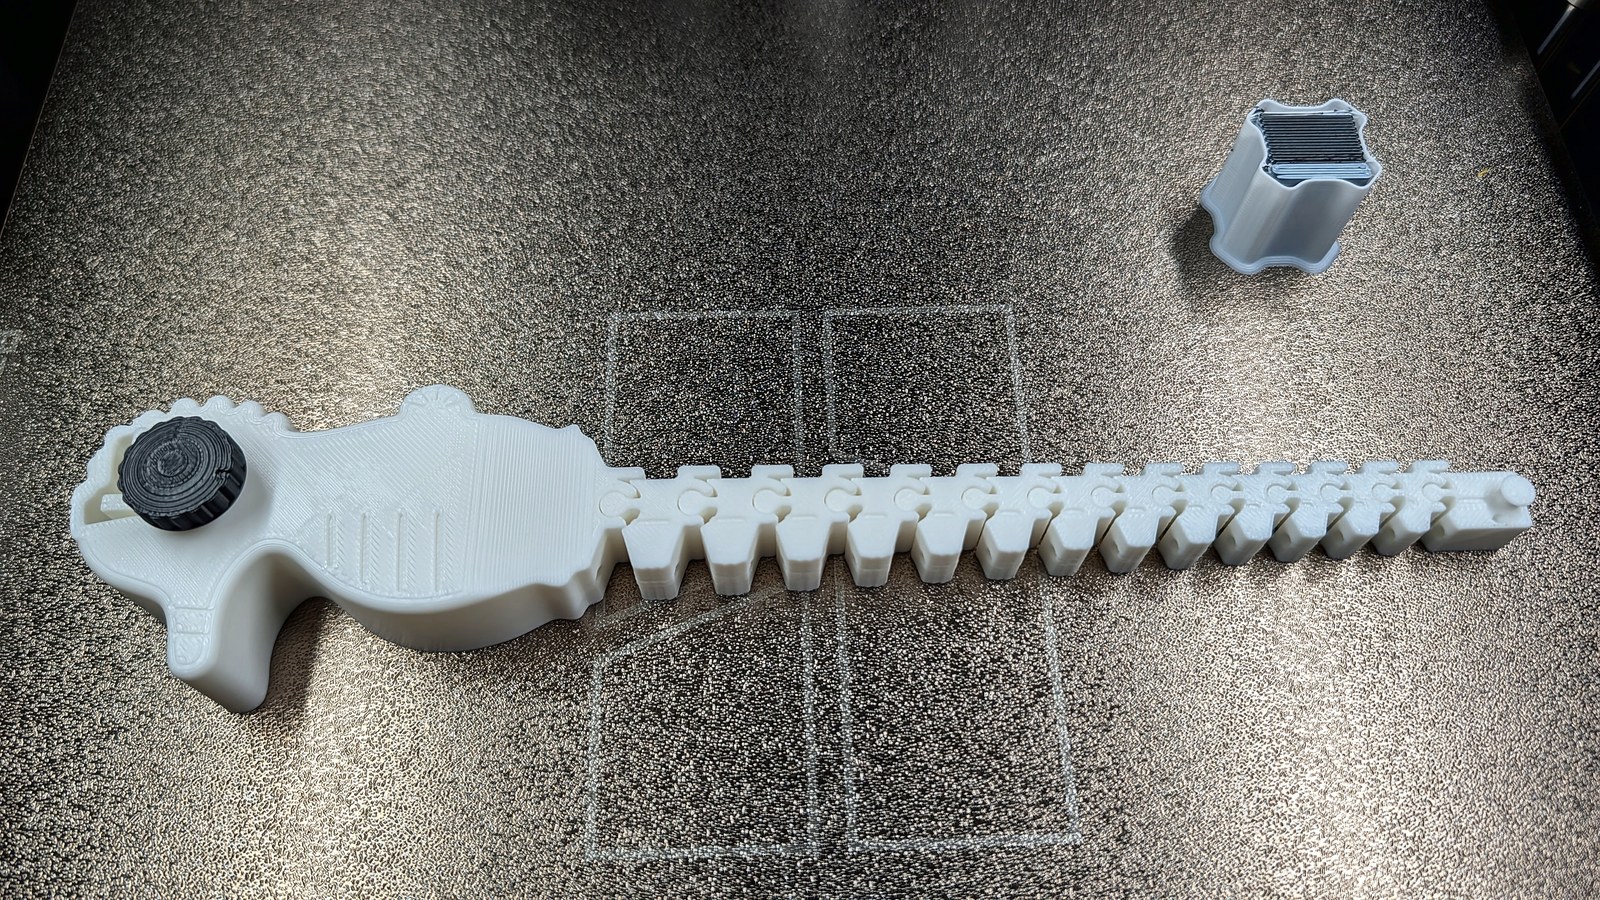
I was most worried about 14 print-in-place joints in a row. I printed a few clearance coupons first, and a 0.2 mm gap in the design turned out right on my printer. The first full tail came off the bed with all joints free, and they hold well even if you try to pull a joint out sideways. That part just worked.
The ratchet that never locked
The first eye knob turned, but the teeth and the pawl never locked, in either direction. When I checked the print, the small sharp teeth came out rounded, so the real overlap between tooth and pawl was much smaller than in the design. On top of that the knob sat on a split post that wobbled. Basically, there was nothing left to hold.
The fix was bigger, solid hooked teeth, a matched pawl, and the knob printed in place in two bearings instead of a wobbly post. That one worked well on the next print.
If you ask me what I like most about this one, it’s the print in place again, especially the knob. The whole knob is printed in place, so it comes off the bed and you can just turn it, without any assembly. Yeah, that’s the part I like.
Small things you only find with your hands
The second print worked, but using it showed a few more things:
- the fin was in the way when turning the eye with a thumb and finger, so the grip on the knob moved up above the fin
- the holes in the tail were tight for the 0.6 mm nylon cord, so they became tall slots
- the cord channel at the tail tip had a sharp turn, now it’s a smooth curve, and the exit under the eye gets bigger toward the end so the cord never meets a smaller hole
- the knob had a bit of play, so it got more teeth and a tighter bearing
One more came from the slicer preview: the wall on top of the head was too thin over the release lever pocket. That got thicker before the final print.
Printing Notes
It prints in one piece, no supports, a bit under 4 hours, in white and black PLA Basic on my H2C with 0.2 mm layers. The joints and the eye knob come off the bed free, nothing to break loose.
Model Usage/Resources
Wind the eye and it clicks, the tail curls and stays curled. To let it go, turn the eye a tiny bit more, push the eyebrow fin, and let it unwind slowly.
It’s a model to show how the tail curls, not a strong clamp. The files, the cord stoppers and the threading steps are on MakerWorld.
Hope you find it useful, and if you know an easier way to thread the cord, please leave a comment below.